I was sitting with my work at a show last Thursday and noticed some clay buttons on one of the other lady's hand crocheted hoods and from there we began talking. The upshot of the conversation was the beginnings of a trade: porcelain buttons for a hand crocheted hat and scarf. So later on I went into the studio and whipped up a batch of porcelain buttons. As I worked I became curious about the prevalence of button makers on Etsy. So I later typed 'porcelain buttons' into the search bar. Only three shops popped up. Joan Miller's Button Bliss and Raquel Masri's The Mosaic Shop had some lovely buttons in them. The third shop had no buttons that I could find. Rather taken aback at this paucity of buttons I typed in 'clay buttons' next. Seven shops popped up only two of which used earth fired clays (stoneware it appeared), the rest it seemed were polymer clay button makers. So now I'm wondering where the button makers are? It seems a natural fit with bead making since buttons just look like specialized beads to me. The tag 'stoneware buttons' brought up one more shop with porcelain buttons that were shanked. And finally the term 'shanked buttons' was entered bringing up a fabric and metal button maker. Either we have very few clay button makers on Etsy or I don't know what terms to enter.
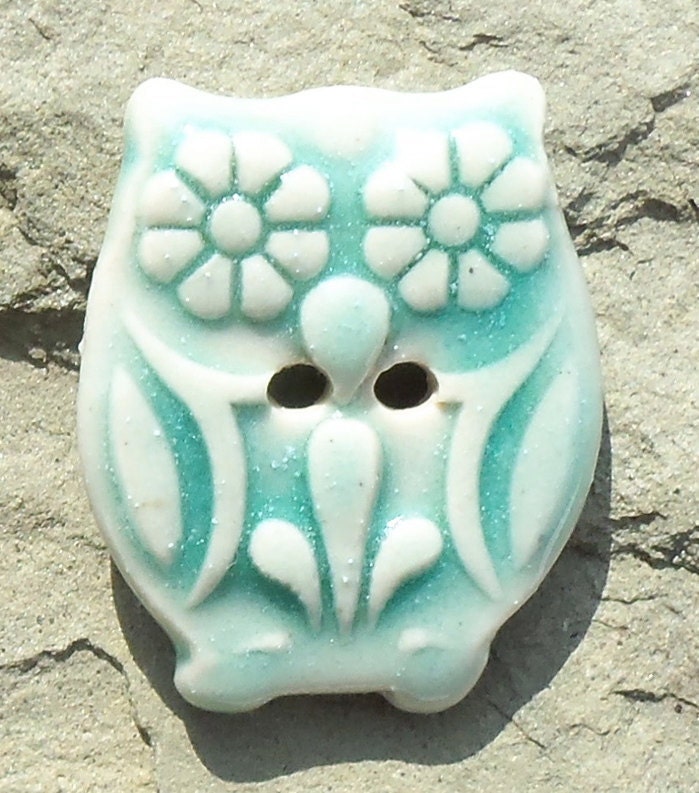
From these questions it was only a short hop and a skip to thinking perhaps some button making techniques and tips might not be amiss in this blog. So here goes. Since one makes flat stamped buttons very much like pendants only with at least two evenly spaced holes in the middle of the flat sides rather than one at the top, making quick, clean holes becomes crucial to productivity. Because the button is flat and resting on a hard surface one of the easiest ways to put a quick set of holes in it is with a straw punching through to the table beneath. Once the holes are firmly established flip the button over and put the straw through from the backside to clean up the edges. This is faster than sponging the edges when the button is dry. Though you will still have to take the sharpness off of the edges of the button once it is dry with a quick sponging. Straws of various diameters

can be obtained from different drink purveyors. For example milk shake straws are very wide. But my favorite diameter straws for buttons are used for stirring hot coffee or tea. They have a very small diameter that is just perfect for button holes.
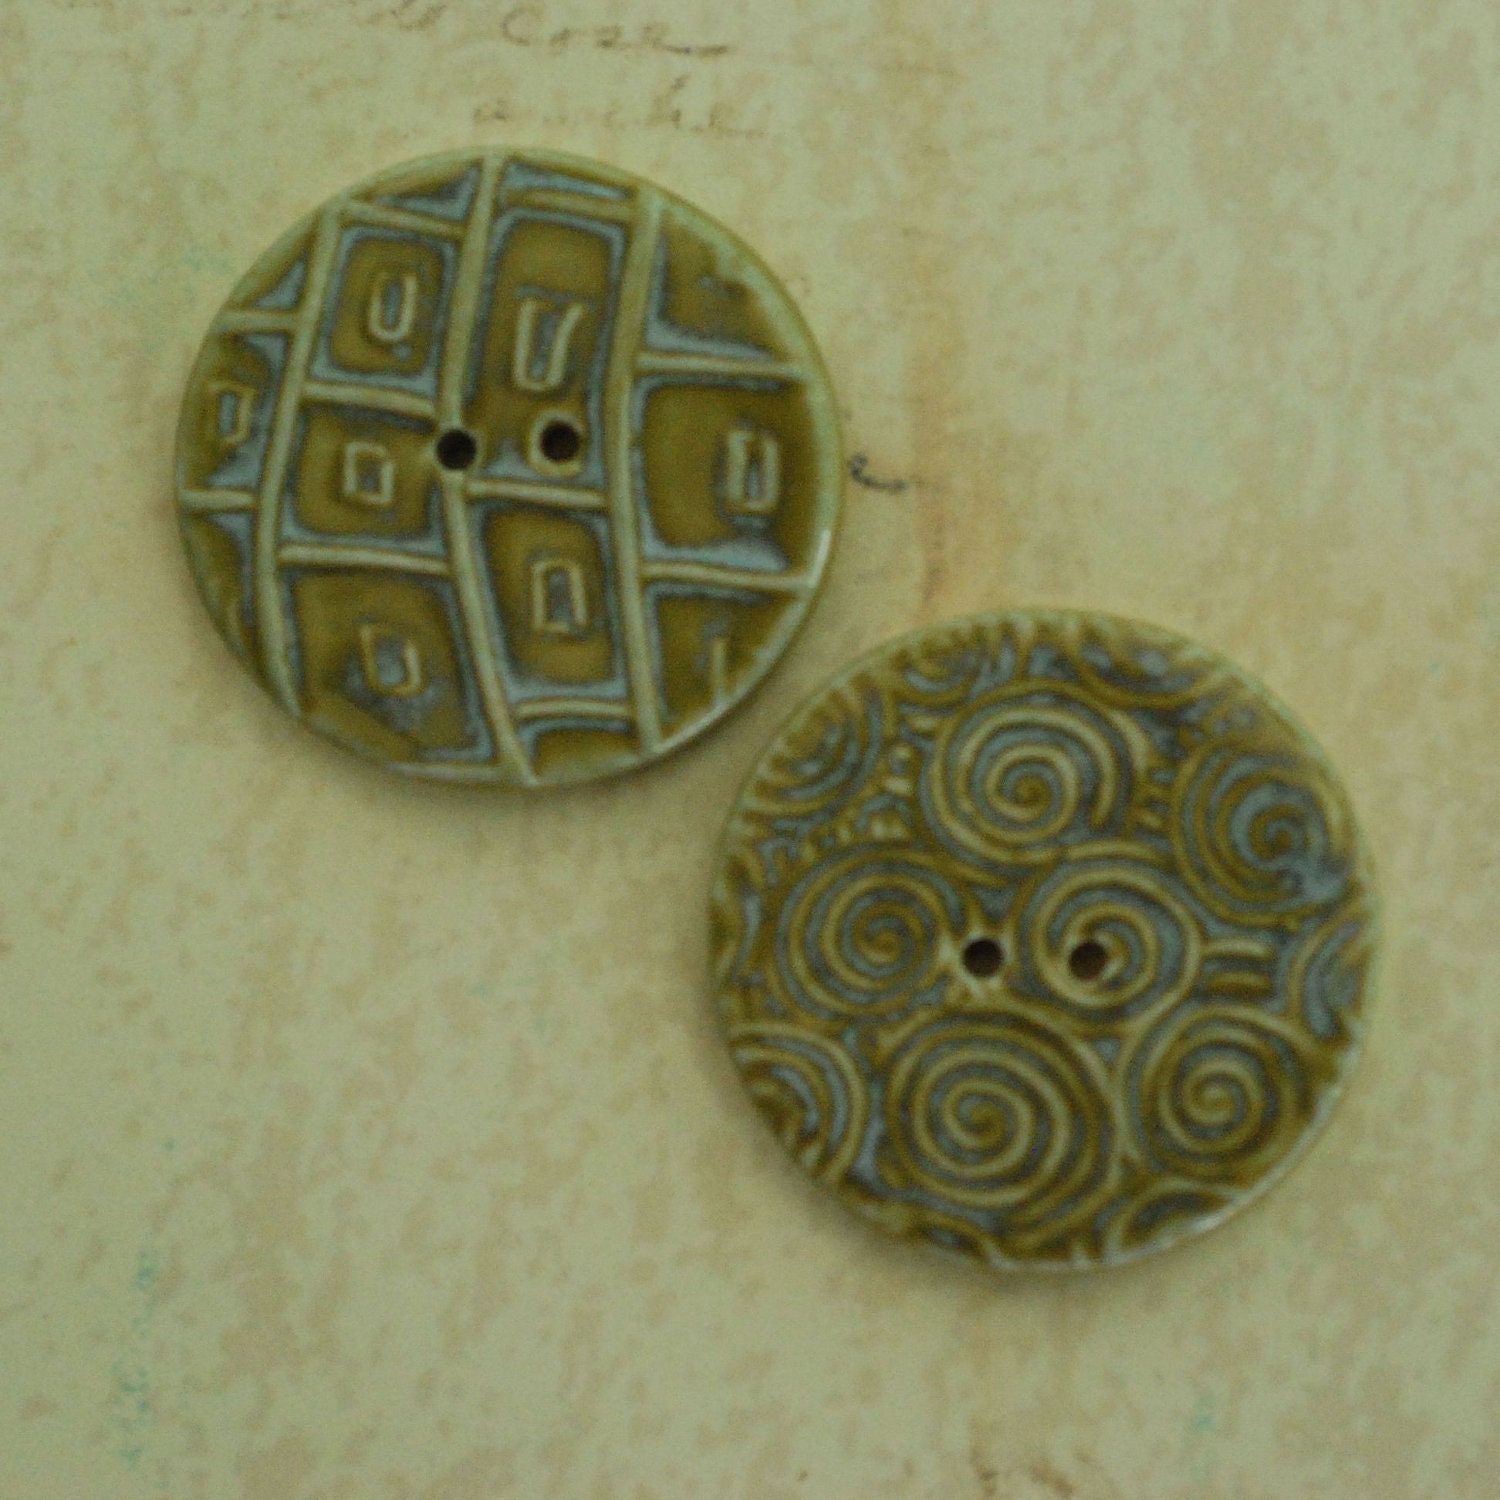
All of our use of texture, stamps, press molds and colored clays and glazes come into play when making buttons just as they do with making beads. But what if the design you are working on for your button would be ruined by punching a set of holes through its middle? Well in that case the answer is to put a shank on the back of the button. I only found two Etsy stores out of 11 that made shanked, fired clay buttons: Joan Miller's Button Bliss and palominoblue. Most of the pictures in this blog are of the process of shanking a button (at least the way I do it).
To shank a set of buttons roll out a coil of clay. Cut it into enough equal portions so that each button has a similar sized ball of clay. Flatten the ball between your fingers, gently. Then flatten one end of the resulting disc. Attach with slip/vinegar the flattened end of the disc to the back of your button. Punch (with a straw) or twist (with a skewer) a hole through the middle of the disc attached to the back of the button. (Don't forget to clean up the backside of your hole.) Voila, you now have a shanked button.
Another reason for us

ing a shanked button, besides that of aesthetics, is the need, at times, to remove the buttons on a garment to make it possible to dry clean or machine wash the garment. Fired clay buttons rarely take well to being clanged around in a washing machine. So a cloth garment will have eyelet holes worked in the front facing through which the shank will fit. A metal pin is then placed through the button's shank hole fastening the button to the material. Remove the pin and the button comes off of the garment. I've seen both cotter pins and safety pins used for this purpose. The whole idea is rather similar to cuff links.


Hope this all helps to spark an idea or two or perhaps another line of beads for you all. As usual my facebook page
http://www.facebook/porcelain.jazz.com will have an album of "How to Make Buttons" pictures as soon as I can get it done. Here are the links to some of the button shops I found: