
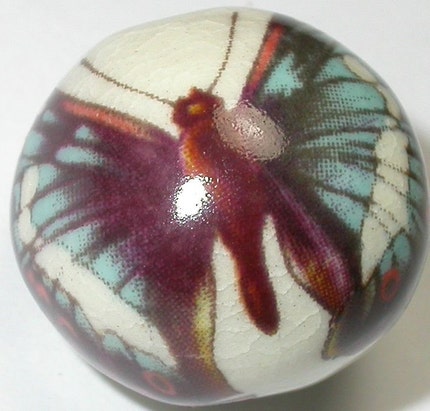
 Butterfly decal on ceramic bead by Natalie Pappas
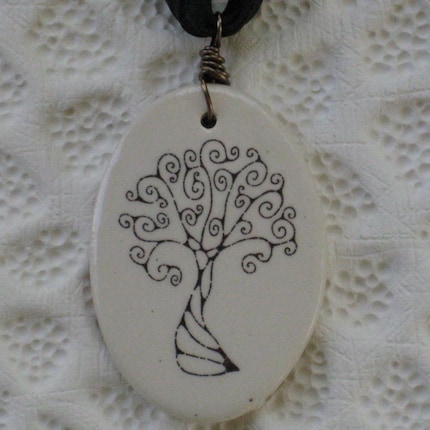 Ceramic Decal Flower Drawing Pendant by MarshaNealStudio
 Have you seen some of the great work BOC artists are doing with Ceramic Decals?
In the recent issue of Creative Jewelry there is a wonderful example of a ceramic decal pendant by MarshaNealStudio . JoanMillerPorcelain , MarshaNealStudio and Natalie Pappas all have fine examples of their Ceramic Decal pendants and earrings in their Etsy stores. Natalie Pappas has recently posted some links on the Beads-of-Clay Yahoo group. These three women are veteran members of Beads-of-Clay and have been very instrumental in getting ceramic beads and pendants recognized as an art form.

Earrings and a pendant from JoanMillerPorcelain in her Etsy shop. What incredible colors she achieves.

More colorful pendants from JoanMillerPorcelain with wonderful detail and design. She says some of these have the image on front and back.

Ceramic Decal Bead by Natalie Pappas
Natalie Pappas has been experimenting with decals for a number of years, starting off with commercial ones and now moving on to her own drawings and photo images. This piece features a commercial rose and a fractal image that Natalie has done using photoshop.
In a recent post on the Beads-of-Clay Group Natalie shared some of the information she has found useful on her journey into Ceramic Decal making. She has offered them to us for this post as well.:
Here is a link that gives you all the info you need to get started making ceramic decals with your own drawings or pics you scan: http://home.comcast.net/~frankgaydos/Decal-1.html
Here is a link that gives you all the info you need to get started making ceramic decals with your own drawings or pics you scan: http://home.comcast.net/~frankgaydos/Decal-1.html
If you want to make your own pics in PhotoShop and then send them to a company to turn them into decals follow this link: http://www.easyceramicdecals.com/
Natalie recently attended a workshop on image transfer onto clay and you can read about it here: http://nkpdesigns.blogspot.com/2009/06/steve-horn-workshop.html
 a wonderful dragonfly decal graces this ceramic pendant by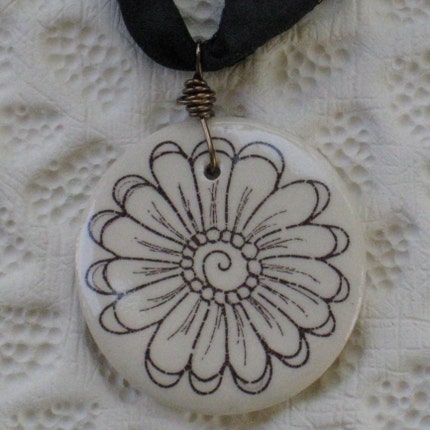
When I contacted Marsha Minutella, artist and owner of MarshaNealStudio, she offered to share her techniques for making ceramic decals for this blog post. Here is what she wrote:
"All of my imagery starts out as a pen and ink drawing. I find that if I surround myself with things that inspire me – usually imagery from various media and objects found in nature, I can sit for some time and doodle in my notebook. I just let inspiration take hold and the drawings seem to transform in front of me. When I find something that interests me within my drawing, I will try to duplicate that particular image to either become a texture plate for my textured pendant pieces or I can scan it into the computer to then manipulate it a bit more before printing it out as a decal image.
When I first began to work with clay as a medium for making pendants, I decided upon working with Cone 6 porcelain and Cone 4-6 glazes because of the durability and color variations available commercially. As I have started to work with decal imagery, I have decided to try to limit myself by using the decals on a clear Cone 6 glaze only. I have been experimenting with my colored glazes and find that the less reactive, lighter colors seem to take the decal image best. When trying the more reactive glazes and the darker glazes the decal either became distorted or disappeared. This is due to the fact that the decal image is printed on a sheet of clear laser printer water slide decal paper (Source: http://www.decalpaper.com/product-p/l825c.htm) and the iron in the ink is what the actual decal image consists of. And that iron image is transferred into the glaze surface during the kiln firing.
For my Cone 6 clear glaze, I fire my decal image to Cone 1.
Here is what my typical firing schedule looks like:
Bisque firing to Cone 04
Glaze firing to Cone 6
Decal firing to Cone 1
Here is what my typical firing schedule looks like:
Bisque firing to Cone 04
Glaze firing to Cone 6
Decal firing to Cone 1
To be able to print one of my line drawings as a decal image, I have to first scan the image into my computer at 300dpi. I then use masking and painting tools to make sure the image is a nice dark black. I can then resize the image and duplicate it so that when I print out the image on the 8.5”x11” laser water slide decal paper, I use as much of the paper surface as possible. After the paper is printed and allowed to dry, I cut the image out as close to the outermost black line as possible. When ready to work I put the decal pieces into warm water to soak until the paper backing is ready to come off and slide the decal image onto one of my glazed pendants. I press out all of the air bubbles and make sure that the decal is where I want it to be. After letting it dry for at least 12 hours they are ready to be fired in the kiln.I had tried experimenting with various firing temperatures for my Cone 6 glaze, and found that the combination that worked for me was a thin coat of glaze and Cone 1 decal firing. If you are thinking of giving this a try, be prepared to do some testing on your glazes to make sure you find your optimum decal firing temperature. Also, when you are working on your computer, try variations within grayscale and black & white images to see how your image comes out.
Here are some sites I came across that helped point me in the right direction while experimenting with the process:
http://home.comcast.net/~frankgaydos/Decal-1.html
http://lindaarbuckle.com/arbuckle_handouts.html
http://nkpdesigns.com/decaldemo.html
Thank you Marsha for the great tutorial on making Ceramic Decals. Great info from both you and Natalie. And wonderful photos of your work from all three of you.
I hope that if any readers try this process will send me a pic and I will post it on this Blog. And if you are a jewelry designer and use a ceramic decal component in one of your pieces I would love to publish your pic here as well.
Be sure to check out the work of these three great artists and founding members of Beads-of-Clay:
Be sure to check out the work of these three great artists and founding members of Beads-of-Clay:
Posted by Mary Harding


