Welcome to our B.O.C. blog. Learn about the world of handcrafted ceramic beads, buttons, pendants & components.

EXPLORING MAYCO'S STROKE AND COAT

Garlic Keeper: bisque at cone 04, glazed at cone 06 using Stroke and Coat glaze

According to Malcolm Gladwell, in his book Outliers, it takes 10,000 hours of practice to become and expert at anything.

 I think when it come to Ceramics I would add, and also 10,000 experiments and 10,000 mistakes. I'll be sharing some of mine with you in this blog post.


Work Of Our Hands Beads made in Namibia 

Knowing my time in the USA would be longer this year , I was determined to search until I found a product to fix the production troubles I was having with my woman's bead making project in Africa.  We had been using underglaze with a clear glaze top coat, but having many problems with the clear top coat.

Reading about Mayco's Stroke and Coat ® intrigued me because it was described as sort of an underglaze, but not needing a clear coat on top.

At first the product did not seem very versatile, because it's rather thick, and takes 3 coats. I was used to underglaze which can be thinned down to act like water colors and can produce incredible detail, I didn't think I could get the effects I wanted with Stroke and Coat. 
Then, I started to explore and found that it is actually extremely versatile. And indeed the "Wonder Glaze" they claim it is.
I will tell you now about my discoveries. 

STENCILING OR SCREEN PRINTING:
Paint on your 3 base coats and then use a contrasting color to stencil or screen print on top of the base color.

LAYERING

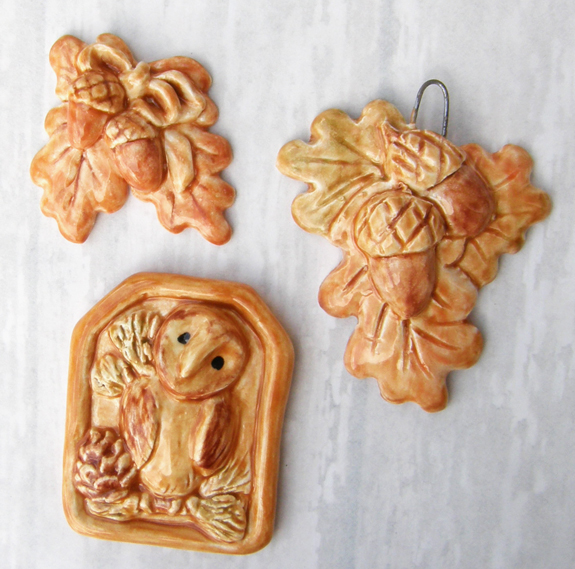
On these pieces I painted 2 coats of Ivory and 1 coat of Cracker Jack Brown, then while the brown was still wet, I dabbed on some other colors,( green , dark brown, and orange) This gave me some subtle color variation.

DIMENSION 

Here I painted my 3 coats of base color, then put the contrast colors in squeeze bottles. Which I got here.
It's even more dimensional if you do 2 coats of design.

WASHES
As long as you have 3 coats of base color you can thin down Stroke and Coat to a watery consistency for the last coat and wash over all or part of your piece.

PAINTERLY
Here's a combination of colors and washes

FAUX MAJOLICA

As you may know, for Majolica you paint over a glaze. With Stroke and Coat, just paint on your 3 base coats and then add your detail painting on top. For the detail painting I only used 1 coat of glaze. Note: Mayco recommends using their foundations line for the base coats, but I didn't have any so I used the Stroke and Coat® and in some instances I used transparent glaze as a base.

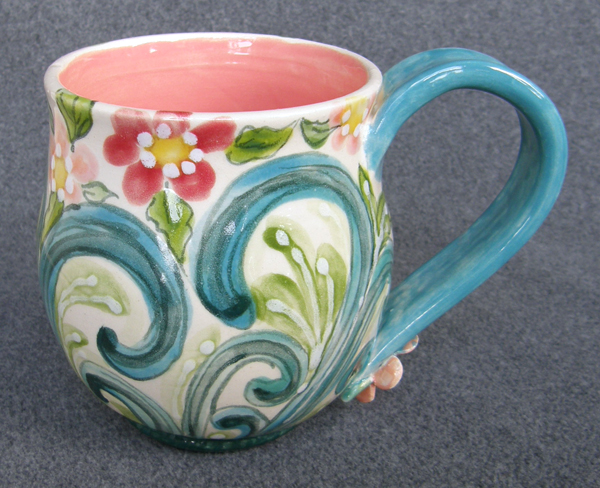
Cup with base coat of clear glaze and Stroke and Coat on top.

Stroke and Coat is suppose to work up to cone 6
(but they recommend firing at cone 06.) All the items above were fired at
 cone 06.

Lets see how it does at cone 6:

 I was very pleased with the color at cone 6 
These samples have 3 coats of glaze.


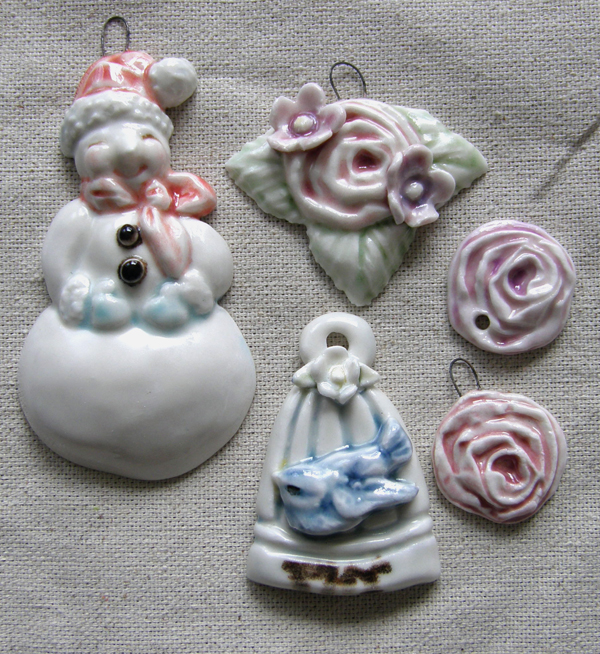
Here is Stroke and Coat over cone 6 porcelain. I base coated each with clear glaze and then used 1 coat of Stroke and Coat. In some cases I like the water color look, in others not ! Worst of all, I lost my lettering at cone 6. The bottom of the bird cage said FLY.


This bowl was a real disaster. I stamped on the flower design and outlined with Mayco's Designer Liner. The Designer Liner is suppose to go to cone 6 but it also seems to spread at cone 6.

In summary and in my opinion, the glaze got an A+ at cone 06 and at cone 6  just know you will not get dimension or much detail but you should get great color. 
One more detail I forgot to mention earlier, but all these pieces that I am not so happy with, can be reglazed with Stroke and Coat. I was very happy to discover that Stroke and Coat sticks very well to previously glazed beads and can give them new life !

Now I just have to see how much Stroke and Coat will fit in our suitcases and save my $ for that extra bag !
 See more about our project at www.workofourhands.blogspot.com and find some of our beads at valsceramicgarden  ETSY

Introducing.... Elaine Ray!


When Marla James asked for an "about me" post I said sure, no problem, easy peasy.  Turns out this was a bit harder than I planned, but it got me thinking - what do I really have to say that is relevant and useful to others?  Well, here it is: 

Hello, my name is Elaine Ray and I make and sell ceramic beads and pendantsI am super lucky to have a great working relationship with and share the task of selling my beads and pendants with a local bead shop, Ornamentea, here in Raleigh, NC.   


Recently, I have been examining ways to increase sales (reading internet articles, listening to youtube videos and trying to keep current with Facebook groups such as Creative Bead Chat), which got me interested in analyzing designs I make and why I choose those designs.  Many people would consider some of what I do "production work" - which is fine with me.  It seems an accurate description for some items and one I don't shy away from.  This was an especially good approach for me when my kids were still in elementary, middle and high school since at that time in my life, most of my artistic, one of kind, solution finding creative energy was directed at keeping everyone "on track" and supporting school activities. Now my kids are grown up and my creative energy is free to flow more directly to my beads and pendants.  


Earlier this year I decided to work exclusively on new designs / colors for one month.  During the first two weeks I concentrated on new shapes, colors, methods and tools.  The second two weeks were for sorting out successful from not so successful designs, tweaking for ease of production and producing for sales.  I have always made new designs and used new colors, but never with such extended single mindedness. During that month, when I was feeling creatively stuck it was tempting to allow myself some time to work on my familiar, well known shapes but I resisted that temptation and for that month I "just said no" to those old friends.    
This was a bit nerve wracking for me to take a whole month to make items I wasn't sure anyone would buy instead of making items that were out of stock - items that I knew would sell.  When the month was over, I realized it was an important step for me to take.  I was reminded to allot adequate time to let new ideas out to play, not just squeezing in some experimental time here and there.  Some ideas from that month are now in production, some are yet to be presented to the public and some never made it past the testing stage.  Thankfully, both the successes and failures continue to lead me on paths to more new ideas, and so on and so on.  
To circle back and sum up this post: I'm now managing my time with a better balance between making familiar, less mentally demanding items and pursuing new ideas.  When I sit down to make familiar shapes (such as rounds or lentils)  I let my mind wander around all it wants, but take good notes and make lists of the ideas as they zoom around in my head so they don't get lost. Then later, I allot adequate time to work through the new ideas, not letting myself go back to the familiar too soon if things get tough. This has seemed to impact my sales favorably and I'm enjoying my work even more.  
I hope I have offered some useful insight to how I work and that it may be of benefit to your craft.   If you have time, leave a comment about ideas that you have tried and how those ideas impacted your immediate or long term sales.    

Thanks for stopping by, Elaine


MAKING A PORCELAIN FLOWER


Have a few tools gathered such as a dowel, knitting needles or skewer, water and small brush, clay and rolling pin, cookie cutters or other cutters, a hair dryer is nice but not essential.
Roll out your clay about 1/8" thick and cut with a fondant cutter, cookie cutter or pattern of your own.