


Have a few tools gathered such as a dowel, knitting needles or skewer, water and small brush, clay and rolling pin, cookie cutters or other cutters, a hair dryer is nice but not essential.
Roll out your clay about 1/8" thick and cut with a fondant cutter, cookie cutter or pattern of your own.

Pinch and smooth the edges of your petals so they are nice and tapered. cover with plastic so they don't dry out while you make the flower center.

cut a long rectangle of clay and make it like fringe with lots of little cuts.

Roll this strip around your knitting needle or skewer.


If you want your petals textured, now is the time to do it. Here you see a texture mold I made in clay to press petals against.

As well as texture, this mold gives a nice curve to the petal.

Finished petals

Wet the bottom of the rolled center and begin to press on petals. Now it starts to get tricky with porcelain because it has no wet strength and the petals want to flop around. Sometimes I give it a little burst of air from a hair dryer as I go.

Ok all petals are attached, but notice how I hold it in the cup of my hand? If not the petals would be broken off by now as they flop down. At this point I like to dry it a bit hanging upside down.

If your finished flower is for a brooch, don't bother with the this step, but if it will end up with a stem, then you will now add a calyx.

Walaa Finished. Well....... except for drying , painting, firing, glazing, firing again.

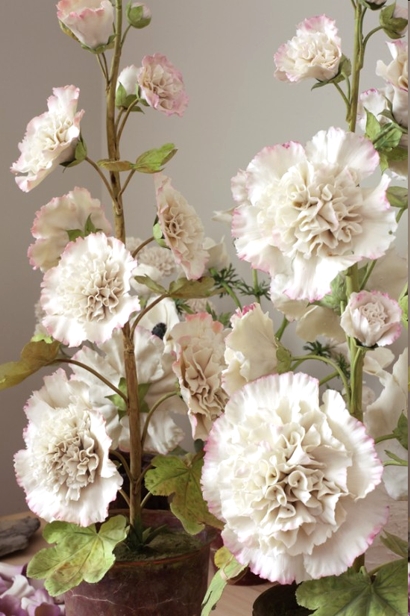
Here are some variations

And of course a rose.
Now that you have seen what mere mortals can do, check out the Porcelain flower "god".......Vladimir-Kanevsky
I would die to be his studio slave and learn !
If you would like to see more of my work
and my Story, please visit:

Great tutorial; I've been working on some floral vases with applied flowers and this will help in my construction methods.
ReplyDeletethanks for the tutorial...these are gorgeous..
ReplyDeleteThose are so beautiful! Thank you for sharing!
ReplyDeleteMy pleasure, glad you enjoyed it
ReplyDeleteWhen using clay cutters, make a bisque tile to plunge the clay out if it sticks by cutting out clay with each of your cutters and firing it. It helps remove the clay without distorting it. Love your flowers, Thanks!
ReplyDelete