

Stamps, rollettes, press molds, carved block printers, and found objects are all texturing tools that we use to add dimension, shape and tactility to our beads. Here in this blog post I’d like to concentrate on those texturing and dimensional tools that I tend to make for myself out of readily available materials.

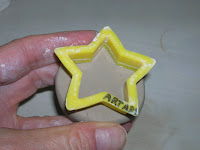
There are several ways to produce stamps and press molds and several materials that they can be made from. Some of the materials include wood, linoleum, plaster and, of course, clay. The simplest ones to make are indented directly into soft clay. (Please take a look at the sequence of pictures to the left showing how this is done.) A fine grained clay like porcelain or whiteware is used because it captures details better and the resulting stamp or press mold is then bisqued (but not high fired). Leaving and using the tool in bisque means that the absorption of the bisque works for you by pulling water out of
 the clay pressed into or onto it thereby releasing it more easily.
Wood or linoleum blocks have to be carved into a design and while wood is absorptive and can be imprinted directly, linoleum is not and needs a releasing agent. I use a single ply of toilette paper tissue for this purpose. You will probably also find that after you have “pulled” several “prints” from your wood block that the wood will become saturated and will need to be allowed to dry before being used again. This can also happen with your clay
 stamps.
Plaster is usually poured around an original found object or original sculpted object. I’m not too keen on plaster in the clay studio in any form because I’ve had plaster get into my clay before and had to throw out a lot of clay that could have been reclaimed. Since that time I’ve found that the fine grained clays work just as well as plaster for small molds. Clay is stronger than plaster, therefore, a clay mold can be thinner and lighter than a plaster mold.
Soft clay can also be carefully pressed around an original found object or sculpted piece. The object is then carefully pried out of the clay while the clay is still pliable. The shell press molds shown in the picture below were made in this fashion. To help your object release from the molding material more easily use a releasing agent like WD-40 for plaster or a single ply of thin tissue paper (toilette paper works great!) for clay. Tissue paper as a releasing agent also works to release your duplicates from non-absorptive molds like those made from plastic, rubber or linoleum. The tissue paper burns off easily in the kiln making clean up a non-issue.


Whatever method you choose to use in making a stamp or press mold you need to make sure your design does not contain any undercuts that could cause the clay from your duplicate to get hung in the mold. The sides of your design should either go straight down or should slope outward, like the insides of a ‘U’ or a ‘V’. The back side of a ‘Z’ is a classic undercut, great for catching and tearing clay.
Contact me if you have any questions or get hung up trying to do this. If I can possibly help long distance I will. Hope this served as a refresher for those of you who are already well familiar with these techniques. Two of my Albums on my facebook page (http://www.facebook.com/porcelain.jazz) give additional information on using stamps and press molds.

Great article! I use a two-part compound from Cool Tools to make flexible molds of things like fossils and vintage/antique items. I just push the clay in and then pop it out. But I'll have to try some of the methods above too!
ReplyDeletePretty cool post Cecily. I still have to work some day on lino prints.
ReplyDeleteI like how you manipulated the clay after you pressed in the star shape cutter. Nice!
ReplyDeleteYou are a Godsend and so is this post. So basic and easy to understand- also short and sweet. I have been looking for this information just recently. Thanks, Nancy Saccoccio @risingdesigns.
ReplyDeletePS I received my wood stamps and now I can't wait to use them!
I had some clay that I was trying to reclaim and it just wasn't working for me, so I used it to make a bunch of different molds from some buttons i found in an old jar. I love it. Except for the one flower that the clay got all stuck up in....still working on that one....LOL
ReplyDeleteGreat post Cecily. Very helpful to so many. Thanks so much for doing this one for us.
ReplyDeleteThanks so much for such a great and helpful post Cecily. The info about porous and non porous molds was something I was just wondering about. Very timely.
ReplyDelete