
Sometimes a bead artist might get tired of creating just pendants and beads. Unique toggles are fun to design and add a new item to your product line.
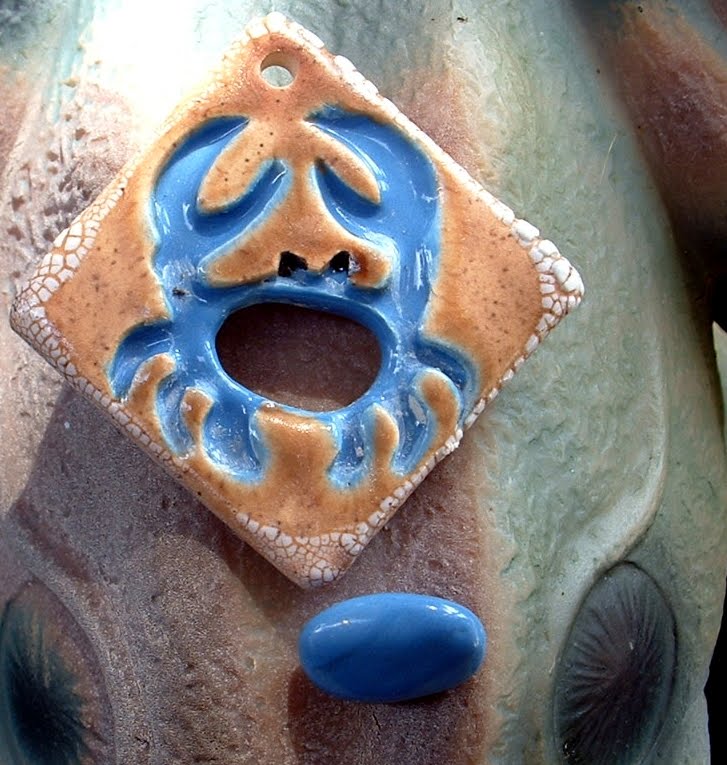
Today I am doing a tutorial on how I made this ceramic crab toggle. His back is a separate piece and serves as the bar part of the toggle.

1) needle tool
2) rolling mat and roller( I use fun foam from the craft store)
3) needle tool or knife
4) slip
5) stamps to create your design with
6) high temp wire around 20 or 22 gauge
7) wire cutters, pliers and round nose pliers
8) paint brush for smoothing
9) cookie cutters and plastic wrap if desired

11) clay

First roll out a slab of clay, I between the slats and on top of your foam mat. I make my pieces about 1/8" thick.
 Use a stamp to press a design into the clay. I have used a foam stamp from the craft store.
Cover the impression with a piece of plastic wrap and put the cookie cutter on top. Center the cutter so that there is space at the top for your stringing hole.
 |
| Use the hole cutter a stringing hole at the top or the side, whichever you prefer |
 |
| Use the needle tool to cut a hole in the center of the design for the bar to slide through. |
 | |
| The paint brush is used to smooth the rough edges made by the needle tool. |
 | |||
| Lay the piece on top of the slab of clay. Use the needle tool to trace lightly the size of the hole. |
 | ||||||||
| Smooth the edges of the crab's back with the brush |
 | |||||||
Shape the wire for the bar back with round nose pliers. Imbed the wire into the back of the crab's back. Fill in the holes made by the wire with slip or tiny rolls of clay, and smooth the back.  |  |
Pretty interesting, thank you for sharing! So many new things to try.... time is what I need.
ReplyDeleteThis is soo cool! I've learned a lot just reading this...Never even thought about saran wrap to get clean edges!
ReplyDelete