Please, excuse us for the long break between our blog posts (previous one was was posted on 7 of March) - we were crazy busy the last few months preparing for the Bead and Button show.
In this Muddy Monday post we will show and explain how we glaze some of our pieces. In our previous post, "Birth of a ladybug" we showed in detail some of our favorite carving techniques, so it's about time to move to the next stage the glazing of the bisque fired beads. Just to warm the engine we'll show you first something really basic - glazing of a smooth round bead. In the the post from January "Changing the world - one bead at a time" we showed the shaping of the exact same bead.
 |
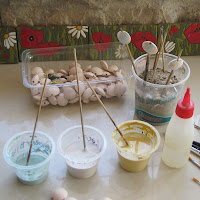
| Glazing workspace |
We think that one of the most important things for the successful glazing is the thickness of the glaze - that's why we are starting with a bit of thick glaze in the cup, and then we are adjusting it drop by drop with water till we reach the right consistency. It's really hard to explain what it looks like - lets just say that too thick will just sit on the brush or will stick to the surface in nasty blobs, and too thin will not give the right coverage so you'll need to apply coat after coat.
OK, enough theory, lets start the glazing.
Glazing of smooth round beads is really simple - only things that you should be careful of is to not let any glaze get into the hole, and to paint approximately even coat of glaze. This video is showing the full process.
Here you can see some ready beads, similar to the ones from our first project for today
OK, enough warming...let move to the serious stuff :-)
We are starting with the glazing of the flower petals. Check this video exactly how we are doing this.
Next step is to paint the yellow circle in the middle. Here is the video with this part.
Here is the last part - the blue background. This video shows how we paint it.
And now you can see the result of all this work. What you think, is it worth all the efforts?
We already had a post about how we are shaping and carving our beads, now in this post we are showing how we are glazing them, so looks like in our next post, scheduled for 1 of August we'll need to show the last stage, the firing of pieces.
Have a great summer!
Vlad & Kremena
Golem Design Studio


Fantastic! Thanks for sharing!
ReplyDeleteamazing beads..you've got a steady hand for glazing.
ReplyDeleteThank you for such a wonderful and informative post complete with great videos. I just love it.
ReplyDeleteCute bead and yes, it was worth the effort!
ReplyDeleteWow, those are beautiful! Thanks so much for sharing, I really enjoyed the videos.
ReplyDelete